


When it comes to handling peak‑season heat, a well‑planned portable chiller rental can save you from sweaty chaos, system failures, or operational stoppage. These units are perfect solutions for short-term cooling demands, and I’ve put together a practical checklist every facility manager should run through before putting in a rental order.
Why Portable Chillers Win When Things Get Hot
Portable chillers are not just a “nice to have.” They solve real problems – emergency cooling, temporary supplement during maintenance, and boosting capacity during spikes in demand. These units can cover everything from data‑center equipment cooling to whole‑floor air conditioning or industrial process cooling.
Because rental chillers come in various types (air‑cooled or water‑cooled) and capacities (from small tonnage to hundreds of tons), you have flexibility. You don’t get locked into a permanent system that may sit idle outside of peak seasons.
Here is how to make sure your next rental does the job right.
1. Define the Need and Scope Clearly
Start by asking yourself what exactly you need the chiller for, cooling equipment, maintaining comfort, backup during HVAC service, or handling a seasonal surge.
- What’s the space size or heat load?
- Is this short‑term (a few days) or for a whole season?
- Are you cooling air, water, or process equipment?
Getting those questions sorted helps you choose a chiller sized correctly for the job, instead of overpaying or ending up undersized. Oversizing wastes money; undersizing causes failure or frequent downtime.
Fun fact: rental chillers are often used for both emergency and long‑term cooling. What starts as a temporary fix can become a seasonal staple without major investment.
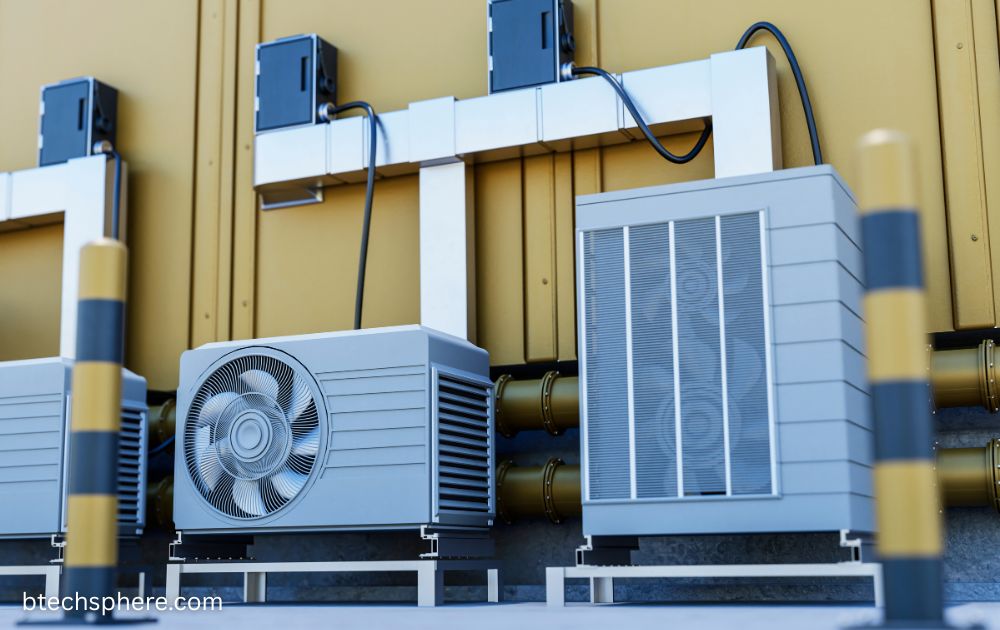
2. Choose the Right Type: Air‑Cooled or Water‑Cooled
Once you know what you need, pick the chiller type that matches the project.
Air‑cooled chillers: easier to install and often placed outside. They blow air across condenser coils, which disperses heat into the environment. Good when you don’t have access to a water loop or cooling tower.
Water‑cooled chillers: produce chilled fluid (water or coolant) that circulates to equipment or air‑handling systems. They tend to be more efficient but require a proper water loop or cooling tower setup.
Selecting the right type avoids wasting power and ensures stable cooling.
3. Confirm Correct Sizing and Capacity
Getting the size right is essential. A rule of thumb often used estimates roughly one ton per 400–600 square feet (with an 8-foot ceiling) for standard spaces of normal occupancy.
If the space has heavy heat generation, machinery, servers, lighting, high occupancy, you will need more capacity. Always aim to match or slightly exceed expected heat loads.
If possible, plan for flexibility. Renting a unit that can be swapped for a more powerful one helps prevent overheating or failure mid‑season. That flexibility is a strong benefit of renting.
4. Check Logistics: Power, Water, Ducting, Location Access
A chiller is only as effective as its installation. Before a rental:
- Ensure you have the required electrical supply (voltage, phase, outlets). Some units may need heavy-duty power.
- For water‑cooled chillers: confirm water supply and drainage or a return water loop.
- Plan airflow: intake and exhaust ducts must be positioned correctly so hot air is expelled and cool air is directed where needed.
- Check that there’s easy access for delivery and installation, narrow corridors or tight roofs can lead to problems.
Overlooking these details can cause delays or even force a canceled rental.
5. Understand the Rental Agreement and Support Services
One of the biggest advantages of renting is that maintenance, swaps, and support are handled by the rental provider. That saves you storage costs, upkeep, and downtime headaches.
Before signing:
- Confirm delivery and removal terms.
- Ask about maintenance and emergency support.
- Determine what accessories are included (ductwork, pumps, hoses, condensate removal).
- Check whether upgrades or swaps during the rental period are allowed (helpful if heat load rises or you mis‑estimated capacity).
Doing this prevents costly surprises when you most need reliability.
6. Plan for Redundancy During Peak Stress
Peak season often means high heat and high demand. If cooling is critical – for equipment, comfort, or safety – consider having a backup unit on standby.
Running two smaller chillers rather than one large one gives redundancy in case of failure. Some facilities that experienced primary chiller failure managed to avoid shutdown by deploying backups immediately.
Treat the rental as part of your overall emergency‑cooling plan rather than a temporary patch.
7. Align Rental Timing Ahead of Demand Spikes
Waiting until the heat peaks or a breakdown occurs can mean long lead times – availability gets tight as many others look for rentals too.
Setting up the contract before demand spikes ensures you get the unit you need when you need it. That proactive approach often gives you better delivery windows and prioritized support. Many rental providers offer 24/7 service.
A portable chiller rental brings flexibility, cost‑effectiveness, and peace of mind. By running through these seven checkpoints – defining your need, selecting the right type, sizing carefully, reviewing logistics, checking the rental agreement, building redundancy, and lining up timing, you make sure you get reliable cooling when it matters most.
Using these guidelines you stay in control. No sweating through summer heat. No guessing games when systems fail. Just cool, dependable air whenever your facility demands it.
Are you craving more? For new content, see my website.
Ductless Comfort: How Mini‑Split Systems Give Quiet, Zoned Cooling While Cutting Energy Waste